
This isn’t a great image. It was shot with a Nikkormat with a flaky meter (since fixed I hope). It’s not really composed well and there’s something wrong with the exposure (can’t really blame the meter as I was carrying an incident light meter in my bag). But it gets worse! The HP5 was over developed and and badly scanned back at home.
How am I doing so far?
And BTW I didn’t do this on purpose. This just shows that even a retired professional photographer with almost 60 years of experience that included running a wet darkroom for a daily newspaper and full-time black and white shooting for my first 20 years can screw up a day of shooting pretty easily.
So how should we fix this mess?
First always make sure your equipment is working properly. Nikkormats are know to have light meters that can be jumpy. There’s a fix on line which involves taking out a screw (which in my case was loose) and squirting some contact cleaner (I used WD40) and screwing it back in tight.
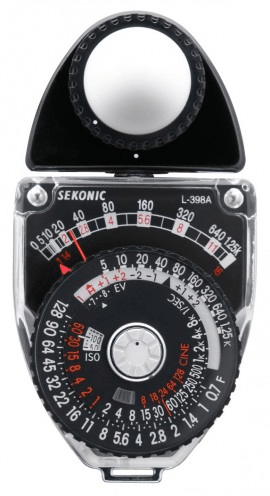
It helps to have a second light meter with you. I own three (Luna Six Pro, Sekonic L-300 and a Sekonic L-358) and on this day I used none of them. Dumb rookie move.
So what’s the big deal about getting the exposure right? Well if you’ve been shooting with a more modern camera with automatic exposure you may not have been paying a whole lot of attention to what was happening when it came to light and exposure. And 99% of the time you get an okay exposure.
But when shooting film you want your exposure to be correct. And when I say correct I mean right on and within one stop (the combination of shutter speed, aperture and ISO).
So what’s the correct exposure? The following from Google:
“A correctly exposed photo, not too dark and not too bright, requires the right combination of your three exposure settings (ISO, aperture and shutter speed). That sounds simple enough, until you realize that dozens of combinations will produce an equivalent exposure level.”
“A correct exposure is one that you are happy with. It means you have set the aperture, shutter speed, and ISO controls well. The result is that not too much light or too little light has made an impression on your camera’s sensor.”
“In principle, a “standard exposure” is the exposure value that reproduces an area of an image with a reflective ratio of 18% as 18% on the film.”
Incident light meters are calibrated to measure for this exposure value of 18% grey (more or less the luminance of white human skin). If properly exposed this light meter reading will provide the greatest dynamic range when it comes to your negative.
This is why you’ll see videos on landscape and portrait photographers shooting with their cameras on tripods (to eliminate camera shake) and walking into the scene or standing in front of their subject with the incident light meter facing back towards the camera. The meter is recording the light that is falling on the dome and is ignoring the subject (which is what a reflected light meter in the camera normally would measure).
So now we’ve got our perfect exposure (so long as the light doesn’t change) and we snap our photo. Now if we’re really picky (and we should be) we can bracket our exposure by taking a shot at one down and one stop up from what our light meter.

Back home we now need to mix up our chemicals as indicated by the instructions on the developer, stop and fixer bottles. Don’t screw this up. When the dilution says 9:1 or 19:1 or whatever use a graduated cylinder and maintain (using a thermometer) a liquid temperate of 68 degrees F or 20 degrees C. Be 100% accurate with your pouring chemicals.
Using a black bag or a light-tight room in the darkness open your film canister and load the film onto your reels and put them into light-tight tanks. Plastic reels and tanks are easier to use but I’m old school and still use stainless steel reels and tanks (which are basically indestructible). Plastic can crack when dropped.
Follow the instructions when it comes to time and agitation and develop, stop and fix then wash. Finally hang your film up to dry in a dust-free room.
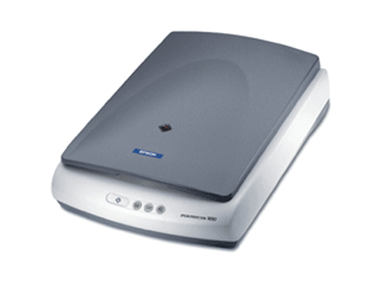
In a couple of hours you can cut your film into strips and load the strips into your film scanner.
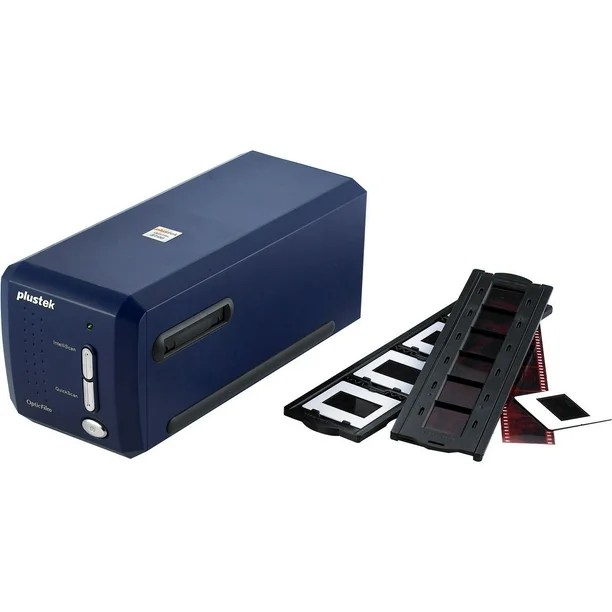
I have two film scanners and I am still experimenting with how to use them. The Plustek line of scanners work well but only scan one frame at a time. I also have an old (ancient) Epson 1650 flatbed scanner and it does four frames at a time which moves the scanning job along a lot faster. I still experimenting with running both and I’m not certain which one does a better job. Epson has a couple of more modern scanners I’d look it if I was buying a new one.
So now with your scans in your computer you can open them with a photo editor like Lightroom or Photoshop. I cancelled my subscription to both a long time ago and now use Alien Skin’s Exposure 7 with it’s long list of easy to use presets for black and white photography. Sometimes the images come out okay LOL…


Leave a comment