Yesterday our club The Oakville Camera Club held a shooting session in nearby Burlington, Ontario for all members to come and practice their shooting.
We were fortunate to be blessed with lots of birds in the air and in the water and of the 15 or so members I’d say just under half were fairly new to photography.
Fortunately at our club there are mentors (of which I am honoured to say I am one) who attend these sessions are there to help new photographers get better at their craft.
One of the things I noticed with several new members is they had their cameras setup in ways that would make getting a properly exposed and focused image just impossible to realize.
Of course this is going to be enormously frustrating and confusing so here’s the basics of how to get shooting even if there are no mentors around to help out.
First thing I’d recommend is reading your manual with camera in hand and go through every menu item and control using YouTube to explain stuff you don’t know. Pay particular attention to the exposure triangle and shooting modes. Attend any and all teaching sessions at the club and don’t be afraid to ask for help later if you got stuck.
For example one of our new shooters was shooting on manual mode (a good thing but not something I’d recommend to someone who was new to photography) and had the aperture set to f/22.
This is a great aperture setting if you’re shooting landscapes and you want everything in focus but it means the shutter speed, depending on the available light, will be set by the camera so slow as to introduce basic camera shake which will result in blurry images or the ISO will be automatically raised so high to compensate that the image will be very very noisy.
Another newcomer had their camera exposure compensation dialled to 3 stops (look up what’s a stop) of under exposure and all the images were really really dark as to be unusable.
I know this is painful but when I was teaching thousands of new photographers for one of our national retailers I told them the same things.
There’s really no getting around having to learn your camera.
Look if you don’t it’s the same as if you had just bought an airplane and now you wanted to fly it to Chicago. Sorry but you’re going to need some lessons.
So here’s the recipe for getting unstuck and shooting better images!
First if nothing is working “reset” your camera to factory specs. All digital cameras can be reset from the menu or in some cases (like Nikon) from the simultaneous push of two marked buttons on the camera.
This will return your camera settings to a somewhat normal predictable position. However it means that you will need to go into your menus and manually reset your camera to shoot raw or JPG (usually fine or superfine) or if you want (as in most cameras) shoot both. After a factory reset most cameras default to JPG normal which isn’t optimal.
Okay so now what?
It depends on what you’re shooting and what is the available light.
And you’ve spent a lot of money on your expensive digital camera so let’s get your money’s worth.
If you’re shooting snapshots of family or vacations or even street photography there’s nothing wrong with shooting in Auto or Program (P mode is just like auto but you control whether or not your flash – if you have one – goes off). The camera will set itself up to with a suitable average shutter speed and a suitable average aperture setting and a suitable average ISO setting.
But let’s say you want to shoot landscape and while you can do it in auto mode you’d have more control if you picked aperture mode where you control the amount of depth of field (f/2 being shallow DOF and f/22 being maximum DOF) and the camera picks the right shutter speed and ISO to result in an appropriate exposure.
The shutter speed will also (hopefully) be high enough to avoid the dreaded camera shake. Camera shake happens when the shutter speed is set too low to and all the images come out blurry because the camera was being shaken every so slightly as you held it. This is one of the reasons a lot of landscape photography is done using a tripod to steady the camera.
There is a rule of thumb here that states the minimum shutter speed should be 1 over whatever the maximum focal length of the lens is that you’re using. In other words if you’re shooting with a standard 50mm lens your shutter speed should be 1/60 (always dial up). If you’re shooting with a 100-400mm zoom then the minimum shutter speed needs to be 1/500 of a second.
There’s more to shooting landscape when it comes to settings as you’ll discover as you read your manual but this will get you heading in the right direction.
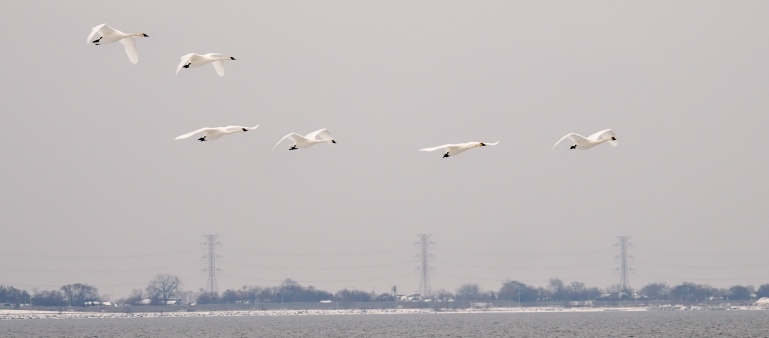
But we were shooting birds in flight on Saturday. What then?
I’d set the camera for shutter priority and I’d fix it at 1/2,500 of a second which will stop most action (this is also pretty good for outdoor shooting of sports like golf or baseball or soccer) including bird wings in flight.
The camera will then, depending on the available light, set the aperture and will likely open the lens all the way. It will also set the ISO which again depending on the available light might be as much as 6,000 or higher. Yes this will result in noisy images but noise reduction software like that found in Lightroom or DXO Pure RAW is amazing at reducing noise in digital images.
Again there’s more to setting your camera that just these basic numbers (this BTW is the exposure triangle).
For example a lot of top-end digital cameras have built-in software that can detect people or birds or animals and even go so far as to be able to focus on eyes (even of birds in flight). It needs to be turned on in the menus and it’s amazing.
For sports or bird photography you’re going to want to be shooting in burst mode where every time you press the shutter a burst of several shots goes off. This will require a fast and large memory card that will run around $50 or so each. You’ll find this setting in the menus.
For different types of photography you can set your focusing points in a variety of ways (single point, small, medium or large patterns).
There are also different ways to setup the focusing where the camera focuses once (SAF) or will continuously (CAF) keep focusing during bursts of shooting images.
All these things are explained (sort of) in most camera manuals and there are a ton of YouTube videos on every aspect of your camera.
Finally here’s the good news:
Once you thoroughly understand one camera you pretty much will understand them all with minor variations from one manufacturer to another.
Photography can be enormously frustrating and confusing like I said but it doesn’t have to remain that way. A little studying and lots and lots of practicing makes all the difference.
And, if it’s any compensation, my bird shots from Saturday weren’t great.
I’m not a bird guy.
Oh sure I got a lot of them in focus and well exposed and framed but I could have done better and this is after 50 years of shooting for newspapers and national magazines LOL.

Leave a comment